
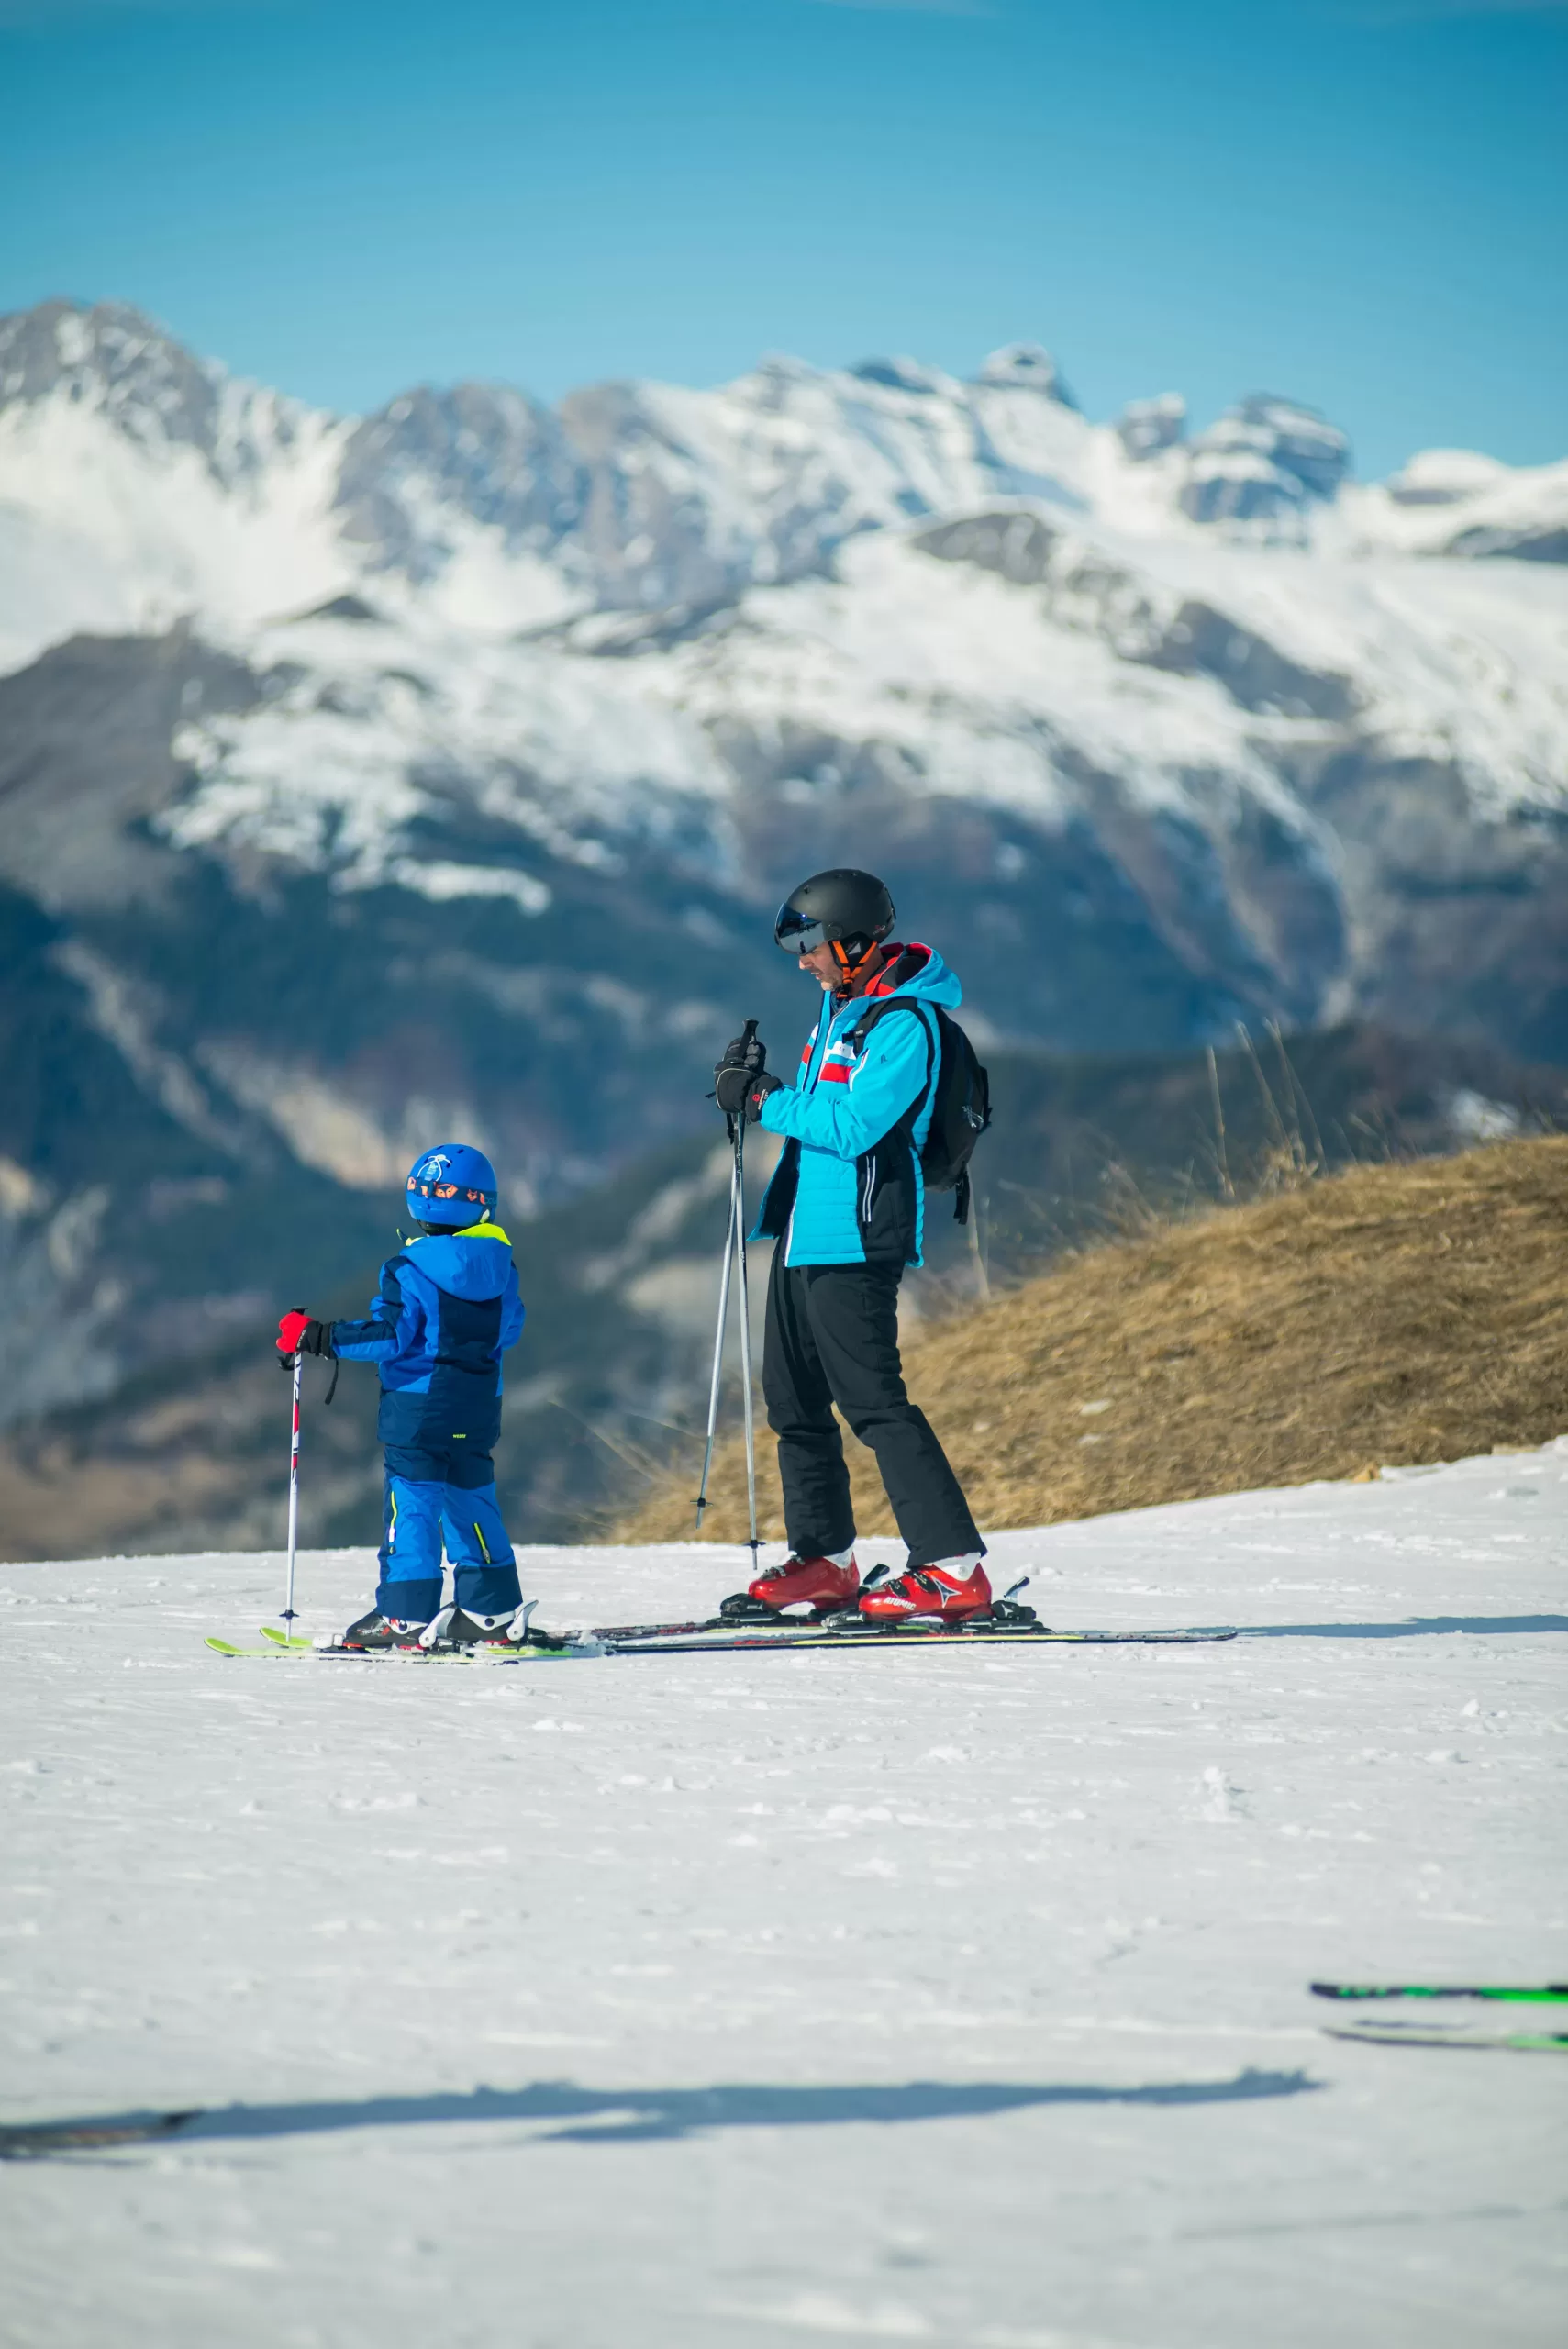

Skiing is a fantastic way to enjoy your time outside in the winter. All ages can enjoy skiing, from 3 to 80 years old or even older. People with disabilities can even enjoy skiing. You should try it if you are an adult and have never skied. Don’t worry about not knowing anything because almost all ski resorts offer lessons for downhill skiing. Some places even give discounts on lessons to adults who’ve never skied before. Try skiing to get your kids more active in the winter instead of playing video games.
I’ve been skiing my whole life and have been a downhill ski instructor for a few years. I love teaching kids of all ages to ski and want more people to experience this fantastic winter activity. I’m providing all you need to know about getting you or your kids started skiing, specifically downhill skiing.
Types of skiing
There are three main types of snow skiing, and each one is very different. I have never tried telemark skiing, but I do cross-country and downhill skiing. I prefer downhill skiing, but both have their pros and cons. All three types require different equipment, so you can’t interchange the skis, bindings, and boots.
Alpine or downhill skiing
 Downhill skiing is done at a ski resort with tall, groomed hills and lifts to help you up the mountain. This type of skiing is all about using the edges of your skis to make turns while going down the hill.
Equipment for downhill skiing involves stiff plastic boots that don’t allow you to bend your ankle very much. They snap into bindings that hold your toe and heal in place on the ski. The skis are fatter and shorter than cross-country skis. They also have some curves or shapes to them and are not straight on the edges.
Nordic or Cross-country skiing
 Cross-country skiing is done anywhere you have snow. It is fun to do on hiking trails that are flat or rolling hills. Skiers power themselves up any mountain because there are no lifts. This skiing is a good form of exercise.
The equipment used is different from other skiing equipment. The boots are flexible and made to lock into a binding with the toe only. The skis are longer and skinnier compared to other ski disciplines. Poles are longer and a necessity because they help propel you forward.
There are two main ways of doing this skiing. One way is skating, which looks like ice skating but with skis in the snow. You push from side to side, and it is typically done on groomed trails. The other way is classic cross-country, and the skis stay parallel while gliding forward one ski at a time.
Telemark skiing
 Telemark skiing is a cross between cross-country and downhill. People do this type of skiing at any ski resort or in the backcountry. When going down a hill, your legs move differently than when you’re downhill skiing. One ski is farther ahead than the other, and that knee is bent at ninety degrees.
The equipment used for telemark skiing is unique for this type of skiing. The skis are more like cross-country skis because the heel is free to move, and the toe is the only part holding the boot to the ski. The bindings to hold the toe are stronger than cross-country ski bindings. The boots are hard plastic, more like downhill ski boots, but they are still different from downhill ski boots. Poles serve more of a purpose than the poles in downhill skiing.
Equipment
What you need to ski downhill
 Skiing requires a lot of equipment, but not as much as some sports. The main equipment you need to start is downhill ski boots, also known as alpine boots and skis with bindings. Skiers should also consider helmets to be essential for skiing. Helmets keep your head safe when you fall and warm. Some helmets even have speakers that connect to your phone for music.
After you know how to ski, I will add poles. Poles are not required to ski downhill and serve more of a purpose when skiing on steep mountain inclines.
What to Wear
 You can wear what you want skiing, but I recommend snow pants even when it’s warm outside. They help keep you dry. I would also wear waterproof gloves or mittens because they protect your hands from getting cut on the snow if you fall. Socks are essential because they can determine whether your feet and legs are comfortable. The socks should fit well and be long enough to go above the ski boots. I recommend socks meant for downhill skiing to be as comfortable as possible. Only wear one pair of socks. Do not tuck anything into the ski boots with the socks. People who tuck their pant legs into their ski boots will start having their shins and calves hurt when skiing.
Another item I like to consider a necessity is a neck gator and not a scarf. Scarves are hazardous when using chair lifts and tow ropes. A neck gator is good to keep your face warm.
Many people think you need ski goggles to ski, but they are not a necessity. They help with the wind and cold, especially if the snow-making machines run. Some ski goggles are like sunglasses and help with the sun’s glare on the snow. Ski resorts don’t usually rent ski goggles. You will need to buy your own if you want to wear them.
The rest of the clothing, including a jacket and different layers, is based on temperature and your personal needs. Check out my post on dressing for winter for more information.
Rent or Own
Many people need to decide whether to rent or buy their own equipment when they start out skiing. One thing to consider is cost. Another is whether the person is going to grow more. Kids grow a lot, and you would have to buy them new equipment each year or at least every other year. If you are going to ski enough times that it is cost-effective to buy them, then great.
Buying your equipment
I have four kids, so I bought some used and some new at swap meets and second-hand sporting goods stores such as Play It Again Sports. Then I would pass them down from kid to kid each year like hand-me-down clothes. The main thing to remember is to buy colors and designs both boys and girls will like. I made this mistake and bought pink skies with a floral design because my oldest daughter wanted them at the time. I forgot that my son might not like to wear them when he is ten years old. If you buy used equipment, ensure the bindings are not too old. If the bindings are old, places that set up the skies will not adjust the bindings for you. It is a safety issue.
 If you don’t know anything about ski equipment and have never skied before, I would only buy from a place that specializes in ski equipment. You will want someone at the store to help you figure out what ski boots and skis work best for you or your child. They can correctly size you for your ski boots and skis. If skis are too long or too short, they don’t provide the correct control when going downhill on them. A good rule for beginner ski length is that the skis should reach somewhere between the chest and chin when holding them up next to you. You can increase the length between the chin and nose as you become a better skier. The longest you should ever go for ski length is to your forehead, and only if you are an expert skier.
Once you buy skis and boots, you need to have the bindings on the skis adjusted to fit the size of the boot. They must also be adjusted to how easily the boots release from the skis. How easily the boots release from the skis is determined by what type of skier you are, your height, and your weight. You should always have a ski technician adjust your bindings to make them safe for the person skiing. If you buy brand new skis and boots, they will generally change the bindings to fit your ski boots and skiing ability at the store where you got the equipment.
Maintaining your equipment
Skis must be waxed and sharpened typically once yearly, but it depends on where, how often, and what type of skiing you’re doing. Ski racing people need to sharpen and wax their skis multiple times during a season. If you ski on hard and icy snow, you might need to sharpen them twice a year. Powdery snow skiing isn’t as essential to keep your edges as sharp. Professionally sharpening skis is limited to several times before the edges are gone, so you don’t want to sharpen them too much.
Lease or rent equipment
Many places will lease ski equipment for the year, so you don’t have to wait in line for rentals each time you go. If you plan to ski enough, this is a great idea to make it cost-effective. For your first time skiing, I would rent the equipment for the day to see if it’s something you or your child likes. Some ski resorts will give package deals for lift passes, lessons, and ski rentals. Some places provide a series of lessons with lift passes and rentals. For example, where I work, they have one lesson a week for 3 weeks. The price includes lift passes for each time and ski equipment that you can keep for the three weeks and use at any time at any ski resort for those three weeks.
When you rent a ski package, it normally comes with skis, boots, poles, and a helmet. Depending on your location, these packages normally cost between $30 and $75 for one day of regular skis.
Types of Lifts
Carpet Vs Towrope
If you have never skied before, I would avoid towropes. Some ski resorts only have towropes on their beginner hills. Carpets are easier to use than tow ropes when you are learning.
Towropes
There are good and bad things about towropes. People who snowboard like tow ropes because they don’t have to take one of their boots out of the bindings to use it like they do if using a chairlift or carpet. A towrope is hard on your gloves or mittens and will start to rip them over time. They also cause your hands and arms to be sore from holding on. If someone falls while you’re on a towrope, it could cause you to fall too. Poles are not allowed on towropes for safety concerns. It’s also essential to secure any loose strings that could get caught and wrapped around the rope, causing you to get hurt.
To use a towrope, you stand beside the moving rope with your skis facing uphill. You might have to pick the rope off the ground but don’t grab it. You put your hands around the rope but let the rope run through your hands. Then, slowly squeeze your hands around the rope and lean back a little to keep your balance. When you reach the top of the hill or the towrope ends, you let go of the rope and ski away from the rope area. If you fall while using the rope, get out of the way. People will run into you if you lie on the ground beside the rope.
A video of how to use a towrope.
Carpets
 A carpet is a conveyor belt you stand on, pulling you up the hill. You don’t hold onto anything like you do with a towrope. Suppose you fall while on the carpet; the operator usually stops it. The lift stopping gives you time to stand back up or get off the conveyor belt.
To use the carpet or conveyor, you slowly shuffle up to the start of it. Please put your hands on your knees right before getting on and keep them on your knees until after you are safely on the conveyor to help with balance. Your skis should be parallel facing forward when getting on. Make sure to face forward, not move when riding up the carpet. At the top, glide off and shuffle out of the way so the next person can get off. You can have poles on the carpet, unlike the towrope.
Chairlifts
 When learning to ski, please stay on the small hills with conveyors or towropes until you can turn and stop on these hills. Once you stop and turn with confidence, you can try a chairlift. Chairlifts usually hold between 2 and 6 people sitting together on a bench seat. Some chairlifts have a safety bar. The person riding the chair can pull it down in front of them after they’re on. Take your ski pole straps off your wrists for safety when getting on a chairlift. When getting onto the chairlift, you shuffle up to the loading line. When the chair comes up behind you, then sit down. Stand up at the top to get off the chair, lean forward, and glide away from the lift.
Gondola or cable car

 Gondolas are like an enclosed chairlift. You take your skis off to ride in one. In some of them, you hold your skis when going up. For some of them, you put your skis in a slot outside. Gondolas can have anywhere from 4 people up to 20 people or more. These stop to allow you to get into them and out of them. Then, the car you’re in will get back on the cable and go up or down the hill.
Drag Lift

 A drag lift is similar to a tow rope but has a bar hanging from a cable. Another bar goes across the bottom of that bar, making a T. You put the crossbar between your legs, and it pulls you up the hill. It might also be a small circular disc attached to the bar hanging down that you put between your legs. Your skis stay on the snow as it pulls you up the hill. Please do not sit on this lift because it won’t hold you up.
Here is a 9-minute video that shows everything you need to know about putting ski boots on, putting skis on, pole length, and riding different types of lifts. I thought this video would be very helpful if you have never skied before and want to learn how to do certain things.
Ski resorts
I would look online for ski resorts near you to find out about any special deals they might have or information specific to that resort. Some resorts require you to buy tickets online ahead of time. Some resorts don’t take cash, only credit or debit cards. It’s important to research the ski resort you plan on going to for resort-specific information.
Signs
Most ski resorts use the same signs to indicate the difficulty of each run. These signs are vital because if you’re new to skiing, you do not want to go down a black diamond run. A run that is too demanding for your ability level would be terrifying and dangerous. People learning to ski should stay on green circles because those are the beginner runs. You can try blue square runs after you’re comfortable on green circle runs. I would avoid black diamond runs unless you can parallel ski with turns and stop, preferably with a hockey stop.


Emergencies
Ski resorts have special employees called ski patrols to help people when they get hurt on the hills. Ski patrols wear red, with the first aid cross on their uniform. They normally ski or snowboard until they are needed. These people are there to help you. They are trained paramedics or EMTs for the ski mountain environment and can safely get you off the mountain if you fall and get hurt.
Lift Tickets
To ski at a resort, you need to buy a lift pass. Many ski resorts offer a variety of lift passes you can purchase. Some have an all-day pass where you can ski anywhere in the resort. There is evening lift passes for a cheaper price at some resorts. A beginner hill-only pass is good if you’re learning. If you plan on skiing a lot, the best deal is a season pass. If you want to ski at various ski resorts, I won’t get a season pass. Some ski resorts have come together to provide a pass that you can use at any of them called the Indy Pass. Vail Resorts owns various resorts across the country that, with an epic pass, you can access any of them. Some season passes are only available for a specific time. If you don’t purchase them, during the time they are selling them, then you will have to wait for the following season. If you plan to buy a season pass, start looking into it before the season begins.
Lighting
Not all ski resorts have lights for skiing at night. Knowing if the place you plan to ski has lights is important because it might determine what time you plan to start and stop skiing for the day.
Lessons
 I recommend getting lessons from a ski instructor. I do not recommend teaching yourself how to ski or asking a friend to teach you. Before I learned how to teach skiing, I tried teaching a friend. This experience didn’t go well, so I signed her up for a lesson with an instructor. She had a much more enjoyable experience being with a trained instructor.
If you want your kids to learn skiing, I recommend paying for lessons. Many kids are more willing to listen to someone other than their parents, but you know your kids best. I never taught my kids how to ski, but I helped them practice after the lesson. Group kid lessons can be fun for kids. They are around other kids their age, and sometimes, they even get to play games. If you want to learn with your kids, then take lessons together. A lesson together could be a fun family experience.
Each ski school has different rules about how old someone needs to be for a lesson. My ski school will take 3-year-olds in private lessons but not in group lessons. Not all kids are ready to learn at this age. If your child is able to follow directions, then they might be ready for lessons. When I teach group lessons, the kids are four years old and older.
Helpful tips before your first lesson
- Try wearing your ski boots ahead of time to get a feel for them.
- When putting your ski boots on, the buckles will be on the outside when buckled.
- Unbuckle all the buckles on the boot first, and then pull the tongue of the boot forward as far as it will go to help get your foot in the boot easier.
- Ensure you wear only one pair of tall socks that go past the top of the boot. Nothing else should be tucked into the ski boots.
- When going to your first lesson, don’t put the skis on yet. Wait until your instructor tells you to put the skis on. They will show you how, so don’t worry about not knowing how to do it beforehand.
- For young kids, use the bathroom right before the lesson to prevent interrupting the lesson and losing time learning.
 Have young kids practice putting their toes together and their heels apart without ski boots, which can be very hard for some kids. Kids will eventually point their toes together with skis on and push their heels apart. The overall skill helps them create a wedge to stop and slow down.
 - All ski schools require any student under 18 years of age to wear a helmet during a ski lesson. Some will require adults to wear helmets, too. Make sure you wear an approved snowboard or ski helmet.

Dress yourself and your child for the current weather conditions. If you or your child’s hands or feet get cold quickly, put warmers in your mittens or boots. Wear a neck gaiter, not a scarf to keep your face warm.


Helpful tips for after your first lesson or if you are teaching yourself
- Practice on beginner hills until you can turn and stop without a problem.
- After mastering turning and stopping, you can try a more significant hill. Just don’t go too big too soon. Stay on green ski runs.
- Remember, everyone learns at different rates. If you play hockey or ice skating, skiing tends to be easier to learn.
- The website ski.com has a glossary of terminology for skiing and snowboarding. The website is a good resource if you don’t know something or what someone is talking about.
 If you try a few ski lessons and decide skiing isn’t for you. Then try snowboarding because you might like that instead.

Skiers Code
The skier’s code is something they will teach you or integrate into your ski lessons. These are universal rules that all people snowboarding, or skiing need to follow or take the risk of being kicked off the hill. These rules keep you and everyone else on the mountain safe.


Leave a Reply